(This program is a replacement/upgrade for Microsoft FrontPage)
"Microsoft® Expression® Web is a professional design tool to create modern, standards-based sites that deliver superior quality on the Web."
For more information on Expression Studio, which contains the Expression Web design tool, visit the Microsoft site at: http://www.microsoft.com/expression/products/overview.aspx
The Future of FrontPage (details at Microsoft)
http://www.microsoft.com/products/expression/en/web_designer/default.mspx
Buying Expression Web:
(To get the student discount, just fax or email a scanned image of your
registration in the class to the company you are buying from.)
http://www.microsoft.com/expression/products/retail.aspx?key=web
Where to buy Expression Web (Academic pricing - requires proof of course
enrollment)
http://www.buy.com/prod/microsoft-expression-web-v-1-0-complete-product-web-designing/q/loc/105/204832292.html
http://www.provantage.com/microsoft-academic-ucq-00019~7MCSV00V.htm
More about upgrading from FrontPage to Expression:
http://www.microsoft.com/products/expression/en/web_designer/fpwd_faq.mspx
The Future of FrontPage (details at Microsoft)
http://www.microsoft.com/products/expression/en/web_designer/default.mspx
More about upgrading from FrontPage to Expression:
http://www.microsoft.com/products/expression/en/web_designer/fpwd_faq.mspx
Using Expression Web
It is assumed that you are familiar with using Microsoft Windows text editing programs such as Microsoft Word or the built in mini-word processor called WordPad, or the most basic text editor, Notepad. With such experience you have already learned some of the basic features of Expression which are generic across all Windows programs, such as saving and loading files (HTML files in this case). For this reason we will not concentrate on generic features of the program, but rather some of the key techniques necessary for you to gain the ability to creating web pages with Expression.
HTML files can have two types of extension names: HTM or HTML, and it does not matter which version you use. Expression allows you also create other types of files, such a template files which save you time in creating multiple pages with the same look and feel.
Expression Web is the latest version of what used to be called "Frontpage". It has integrated into it a file manager that allows you to directly publish your site to a "Frontpage" enabled web server. Note that your web host must support Microsoft FrontPage Extensions (most web hosts offer this). www.AngelFire.com, a free host, offers FrontPage Extensions, and is compatible with the latest Expression Web designer program.
Detailed step by step instructions on using AngelFire.com: http://www.angelfire.lycos.com/howto/newcomer/index.tmpl
Using FrontPage with AngelFire: http://www.angelfire.lycos.com/build/fpfaq.tmpl
Logging into AngelFire with Expression Web - enter this when logging in: http://frontpage.angelfire.com/members/{your user name}
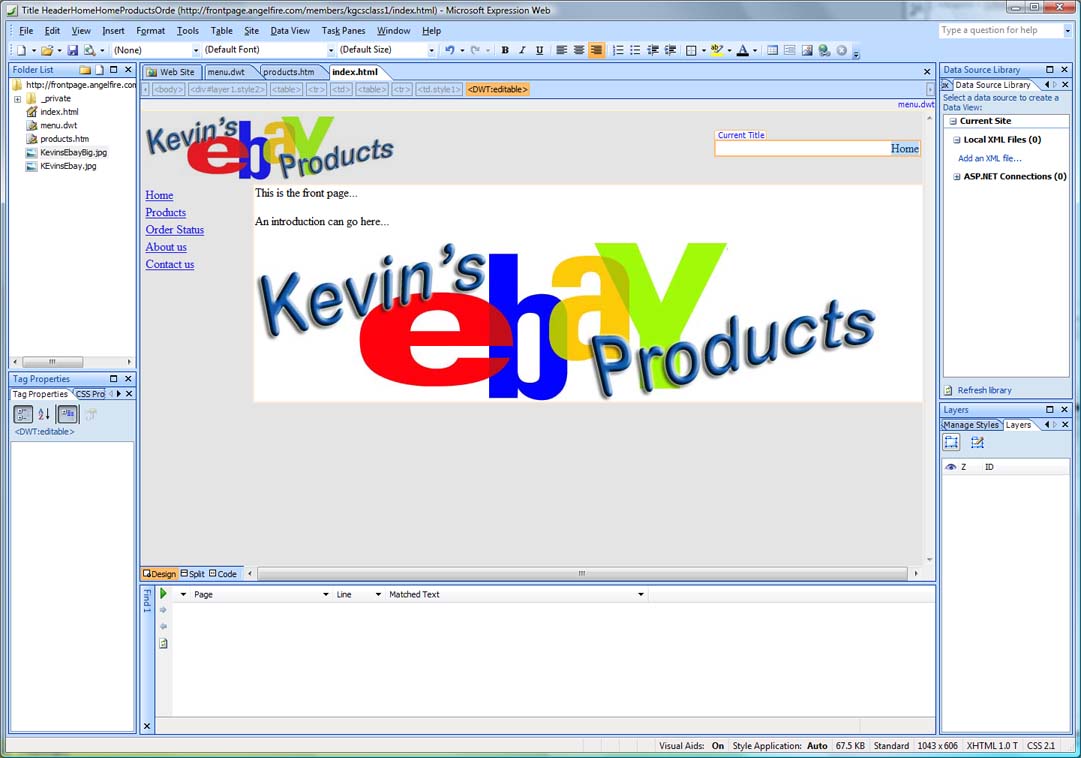
A snap shot of the Expression editor in the midst of editing a live site using "Templates":
Notice there are 5 panes surrounding the main editing region for your convenience. These panes contain often used tools and are right there for you to see and use immediately. For example, the folder list on the top left shows files on the web server (or your local hard disk if you are editing files from your C: drive). The folder list comes up when you open a web site (from the file menu) and log into it with a valid user name and password.
Notice the tabs on the bottom of the editor, Design, Split, and Code.
Design mode is the one shown in the figure, and it is the most commonly used mode, similar to using a word processor. It shows you what the document will look like on the web for the most part, yet shows you enough guides so that you can easily edit the document.
Split mode allows you to examine and also change the HTML that Expression generates for you. This can prove to be very educational if you are interested in the HTML tags and how they affect your document. In this mode, the edit region is split into two sections, the top showing the raw HTML along with your content, and the bottom showing the usual Design mode view.
The Code tab is useful to view only the raw HTML and takes up the whole region area to display your file. In this mode you can change any text or HTML tags. Be careful because one simple syntax error in your HTML can cause the page not to display correctly.
The current version of Expression has numerous enhancements over the previous versions of FrontPage. One most notable change is the why it generates certain HTML codes. In particular, the program tends to favor generating <Style> tags to support various types of effects. This will be discussed in the styles section of this document.
Books on how to learn Expression Web: http://www.microsoft.com/expression/events-training/books.aspx
When you create a main page or "front page" for an address on the web, such as http://kgcsclass1.angelfire.com, the main HTML file name can be any of the following:
Index.htm
Index.html (favored by Angelfire)
Default.htm
Default.html
This means that if you have any one of these files in any of your directories at your site, this will typically be the file that acts as the “default” page that is shown. For example, if we have a file called Index.html in the root directory of http://kgcsclass1.angelfire.com, when someone enters http://kgcsclass1.angelfire.com in their web browser and hits Enter, the page that will be shown to them by default is whatever is in the file index.html. You should only have one of these four types of default files in any given directory on your site. In other words, do not have an index.htm and also an index.html file and so forth in the same directory. This only will cause confusion for you, but the web server will serve up whatever file it sees first or has as a priority in its configuration, which may be different from one web server to another.
Angelfire.com and other web server hosts may prefer and only allow one file name to be your default file. In the case of Angelfire.com, it only allows you to use index.html.
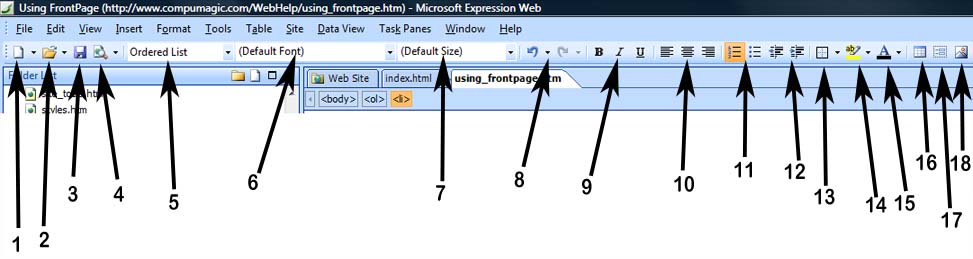
The above image is a cut away of the Expression editor menu and main tool bar.
With all these basic formatting features, it is interesting to use the HTML tab to reveal the tags that get generated after using them.
If you want to center a title page or front page vertically, then create a table, and make it’s specify Height setting 100 percent. Also, to make the table invisible set the border size to 0. The table will stretch vertically in the web browser window, conforming to the size of the users web browser window. To make the settings, right mouse click on the table, then click on Table Properties. More about tables is discussed in the Tables section below.
Formatting Text
Bold Text
Keyboard: Alt-B
Menu: Format, Font, Font Style list box
Tool Bar: B (View, Toolbars, Formatting)
Italic Text
Keyboard: Alt-I
Menu: Format, Font, Font Style list box
Tool Bar: I (View, Toolbars, Formatting)
Underline Text
Keyboard: Alt-U
Menu: Format, Font, Font Style list box
Tool Bar: U (View, Toolbars, Formatting)
Fonts
Fonts can be changed by using the Tool Bar or the Format, Font menu.
<font face="Broadway">This text is the Broadway font</font>
<font color="red">This text is red</font>
<font size="6">This text is 24pt (point)</font>
The solution is to copy your text into Notepad, and then copy it again in Notepad and then into FrontPage. To the steps are: In your external program such as Word, highlight the text you want to copy, press ctrl-c to copy it to the clipboard, and then open notepad, and paste that text into notepad using ctrl-v. Next, highlight the text you want to copy in Notepad, and now position your cursor in FrontPage where you want the text to appear, and press ctrl-v.
To start using FrontPage you can think of it as a word processor. Type in some text, letting it wrap around to the next line if you are creating a paragraph. Press Enter on the keyboard to end the paragraph, which will move the cursor down 2 lines. If entering a short line of text, press Shift-Enter at the end of the line, which will make the cursor move down to the next line.
Pressing the Enter key in FrontPage editor automatically inserts the <P></P> tag pair and any text you have typed will go in between the tags, unless you press Enter on a blank line. In this case it inserts <P> </P> which has the special code in between. This character code is what is called a non-breaking space. It is basically a space character that usually is obtained with the space bar on the keyboard.
When you use Enter you create a <P> pair </P> and this causes the cursor to move down two lines, leaving a blank line below the previous text. This may not always be desired, such as when putting an address on the page, where each line must be close to each other. So what is needed in these instances is what is called a single line break. This can be accomplished by using the Shift key in conjunction with the Enter key. The code in HTML is <BR> and this is a single tag that gets inserted at the end of a line of text when you press Shift-Enter. It causes the cursor to move down to the next immediate line in the FrontPage editor. Example:
First And Last Name{press Shift-Enter}
24 Somewhere Drive
You are not limited in FrontPage to editing only with the graphical user interface. Using the tab at the bottom of the editor window, click on HTML to view the source code of the current page. You may edit the HTML and the text of your document in this mode. Sometimes (rarely) this is necessary to override something that FrontPage generates or that is actually does wrong. This is why it does not hurt to learn the basics of HTML at least.
To see what your document will really look like when you view it with a web browser, FrontPage has a built in web browser (basically a mini version of Internet Explorer). To use it just click on the Preview tab at the bottom of the editing screen. To return to the editing mode, simply click on the Normal tab.
You can also preview your page in a browser by clicking on the File menu, then selecting "Preview in Browser..." which will open the page you are editing in the default web browser (either Internet Explorer or Netscape Navigator).
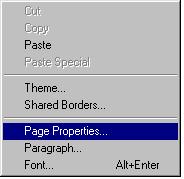
You may recall that earlier in this document we discussed setting the title of a web page using the raw HTML coding method and the <TITLE> </TITLE> tag pair. With FrontPage editor you may do that same thing using the graphical user interface of the program. We set the title of a page in order for users that save your page in their favorites or bookmarks will see this title.
Anywhere on your page right mouse click and on the menu that pops up select Pare Properties
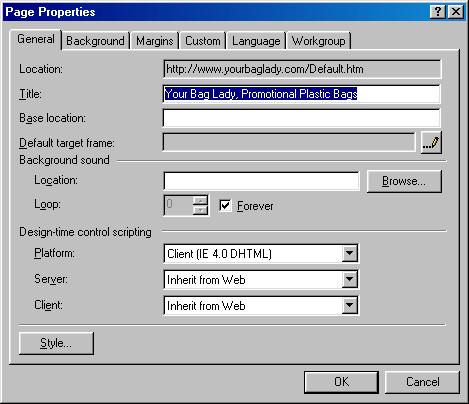
Simply enter in the Title: field the title of your page. Be as descriptive as you like, because this sometimes makes a difference in people being able to find your page in a search engine. However, do not create a very long description, like more than 100 characters (this is done sometimes by sites that wish to hog the attention of search engines and is very inconsiderate to users that wish to book mark such a site).
Earlier in this document we discussed setting the keywords and description of a web page using the raw HTML coding method and the <META> tag. With FrontPage editor you may do that same thing using the graphical user interface of the program. This is useful for search engines when they come across your site and index it in their database. Anywhere on your page right mouse click and on the menu that pops up select Pare Properties. When the Page Properties window comes up, select the Custom tab.
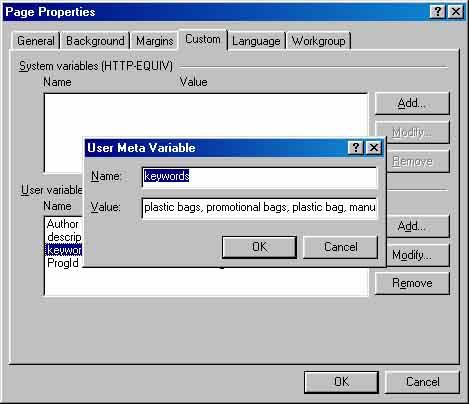
At the bottom of the window you will see the Add... button, on which you should click to bring up the User Meta Variable, as shown above. On this window enter in the Name: as keywords, and for the value enter your list of key words or phrases separated by the comma character. This list can be very long and it will scroll off to the right, so do not worry. For the description, do the same thing. Hit the Add... button, then add the Name: field as description and then for the Value: field type in the same thing you did for the keywords but without the commas.
A text hyper link is the most popular type of link on the web. It is usually noticeable by being underlined in a blue color. An example is this external link to CNN. We call this an external link because it brings your web surfers out to a different site than yours. To create a text link, just type in the text you want linked and then double click on the word to highlight it, of if it is several words simply drag your mouse over the words to highlight them. Now click on the Link icon on the top toolbar, as shown below.

Clicking on the Link button will bring up the Edit Hyperlink window:
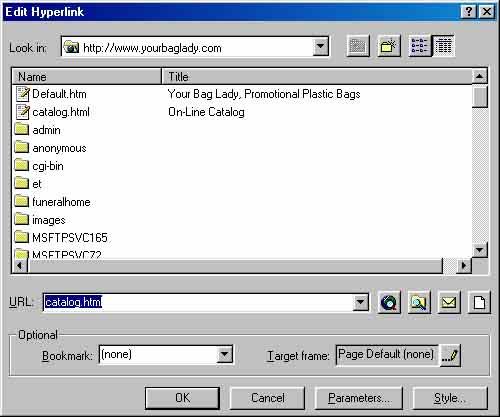
Now just type in the file name in the URL field of the page you wish to link to, if it is a page within your own site. If it is an external page, such as CNN, then you need to type the full URL such as http://www.cnn.com.
To make an image "linkable" so that a user can click on it to link to a different page do the following: Right mouse click on the image while in the Normal editing mode and then select "Hyperlink" on the popup menu. You can also click on the image with the left mouse button and then press Ctrl-K on the keyboard. This brings up the same Edit Hyperlink window as shown above. Now just follow the same guidelines for creating a text link. Type in the URL and click the OK button when done.
Making an e-mail link is about the same as making a text link.
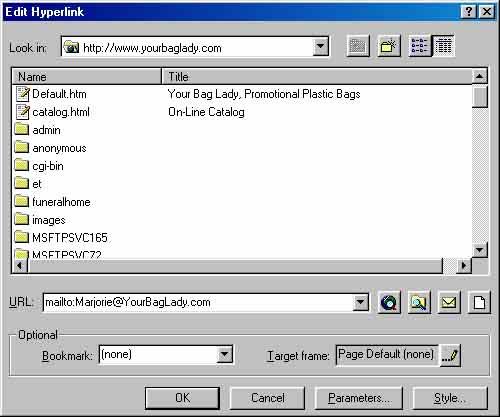
Type in the name of the link, such as MAIL ME, then highlight the text and bring up the Edit Hyperlink window from the toolbar link button. Now in this window click on the little yellow envelope button at the bottom right side of the window, across from the URL edit field. This brings up the Create E-mail Hyperlink window as shown below.
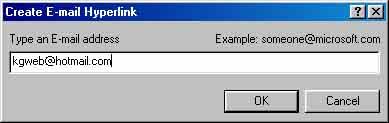
Type in the e-mail address you wish to link to, usually your own, then press the OK button to save it. This will create a hyperlink on your page so that when a user clicks on it, it will bring up their default e-mail client program installed on their computer and the Compose Message window. Of course if the user does not have an e-mail client program installed, or they are working on a public computer, it is wise to list your actual e-mail address on the web page along with the link. For example: MAIL ME at kgweb@hotmail.com. This way the user can see and type in your address into their web based e-mail or just write it down.
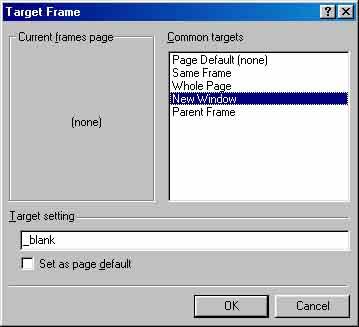
Linking to a New Window
If you want the web surfer to click you link but not loose the current page
they are on, you can create a link in such a way that when clicked on it will
open the linked to page in a separate browser window. This can be very
helpful if you wish to keep your audience on your site when linking to
external web pages. To do this, simply edit the hyperlink and in the
"Target frame" field, select the little pencil icon button, and then
on the Target Frame window that pops up select "New Window" as shown
below.
Interactive Button Links
Insert, Interactive Button
![]()
|
With GIF image
|
When you link to another page or graphic image, then you need to be careful that FrontPage does not save that link as a reference to your own hard disk. For example:
file:///C:/mywebs/Kevin/contact.htm
If you notice FrontPage doing this, you should remove all the path part of the link up the the page filename, so that for example is would look like this: contact.htm
Otherwise the syntax with the "file:///" reference in it will cause an error when someone on the web clicks on the link, since they will not have your file on their hard disk in the same location as yours. This linking problem sometimes happens when you are saving files to the local C: drive in FrontPage. Same thing goes for the link references to JPG and GIF images. Make sure the properties of the images (right mouse on the click to get properties menu) are such that they point to the image filename only.
Bookmarks
This is a bookmark link to a location on this same page.
Everyone has their own style when it comes to laying out a web site. But there are some basic things that should be adhered to regarding links and consistency. An excellent reference on the web for learning good layout style is the site called www.WebPagesThatSuck.com
Below (and at Class Sample) is a sample basic layout for a site that represents a company that sells a product. It has some of the most common elements, but by far is not a full fledged site, just a sample to present the concepts.
This is the home page with the links to the various pages within the site. The tables are usually set with the borders to 0 to make it invisible, but in order to reveal to you the layout of the table, border size was set to 1 and cell spacing set to 0.
| Kevin |
Home |
 |
Welcome
to our site! This section is the introduction to your site. More information could go here introducing the company or the person, depending on the type of site it is. This is a cell, so all text typed in it will automatically wrap around to the next line. As you type text, the cell will grow vertically if necessary. |
| Products Customer Service About us Links |
Body of page or continuation of intro goes here. This can be a continuation of the text above that appears in the intro section, or it can just be a new paragraph that you start at the top of the cell. This text can continue down through this cell and will automatically grow the cell as you enter text. |
| Contact | © 2000 |
You can see the concept here is to have links that lead to other pages in the site. The other pages could use the same invisible table and some common parts, such as the logo graphic, and links.
All sites must have at least a contact link. The rest of the links are really dependent upon the type of site your are creating and your own personal taste. Creating web pages is a very personal and creative thing, especially if it is about yourself! For companies, it is pretty important to have at least a contact, about us, and products link.
Here is the contact page:
| Kevin Gough | Contact |
|
|
You can contact us
at the following address:
Kevin Or you can phone us at: Or you can e-mail us at: |
| Home Products Customer Service About us Links |
|
| © 2000 |
Notice that here on the contact page, we do not have any contact link at the bottom left corner, since this is the contact page. Notice also, that unlike the front page or home page, we now have a link called Home. This naturally leads the web surfer back to your main page. It is very important that all pages within your site have a link taking the web surfer home to your front page. This is because search engines will index all your pages and someone searching the web may bring up one of your outer pages and then they must need a link back to your home page from there.
All the rest of the pages can have the same basic table layout. To copy the table, you can select the whole table using the Table menu item, then Select, then Table on the menu. Now copy the table to the clipboard with Ctrl-C or on the menu use Edit, then Copy. Create a new blank page with the first button on the top toolbar (looks like a white piece of paper). In the new blank page, use the paste from clipboard function, Ctrl-V or from the menu, Edit, Paste.
Remember, each page should get its own unique title, and you can do this by right mouse clicking on the page and then selecting Page Properties.
Letting FrontPage do the grunt work
FrontPage has a robot built into it that allows you to create web sites from predefined templates.
This can be access through the File, New menu, and then on the right side of the screen, selecting "Web package solutions...". This will bring up a list of possible styles to pick from, such a "Personal Web Site". You have the option to specify where to create this site as well.
Note, that while this is a fast way to create a site, and that you can modify it after the fact, it does use what are called "Web Bots" that are specific to FrontPage, and as such may not make your site portable to other tools such as DreamWeaver.
Example personal web site template generated by the FrontPage robot:
http://www.compumagic.com/class/7/index.html